
We went on a mini-bike tour last weekend and I decided to take my big, honking 5D along for the ride. I placed the camera in my Ortlieb Ultimate 5 Handlebar bag and everything worked out well.. until I decided to take the bag off of the bike and walk around.
The strap clips into place on the side of the bag. I clipped the strap onto the bag until it clicked on both sides and our group sat down for some well deserved beers after a long day of riding.
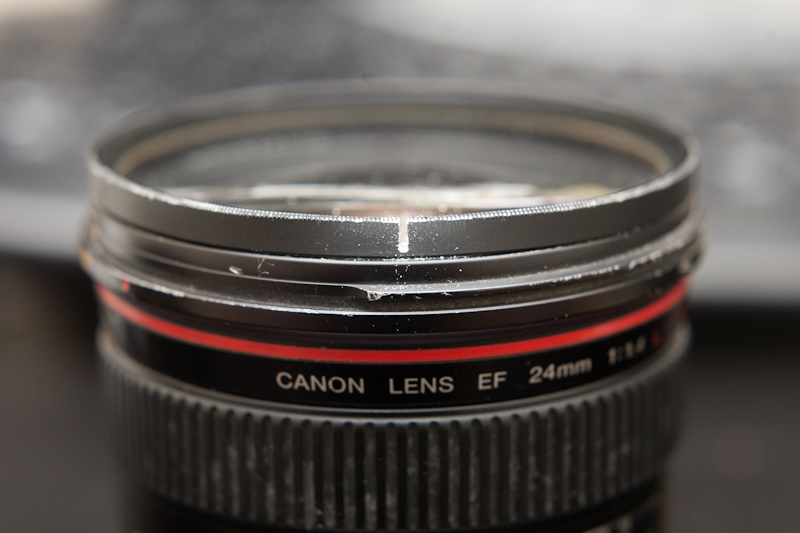
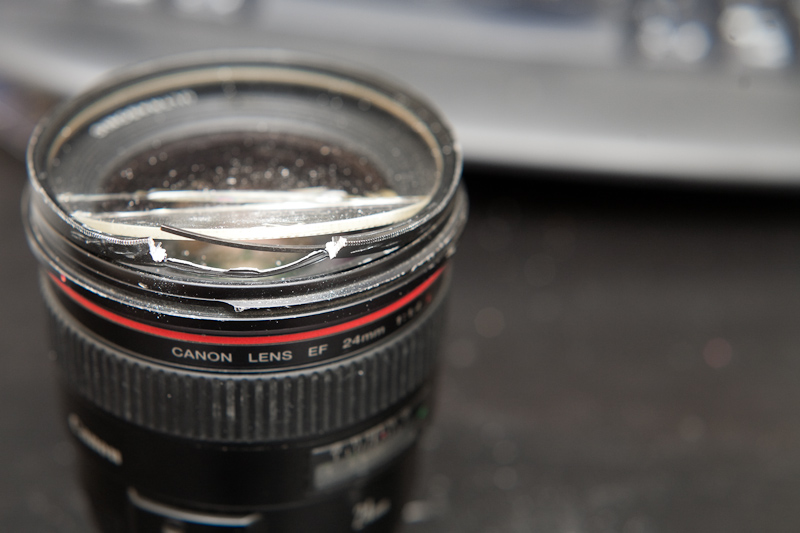
As we were leaving the bar, I got up and took a few steps. The bag fell as the strap somehow had come off of the clip. I didn’t think anything of it at the time but got a lot of weird stares the next time I took my camera out to take some photos. The lens filter had cracked (I am so glad I had one) and the edge was dented so that I couldn’t remove it. It was stuck. I had a little bit of neoprene padding in the Ortlieb bag, but apparently that wasn’t enough.
I have mixed feelings about the bag, by the way. It’s pretty well constructed like any ortlieb bag, but it rattles and doesn’t work well with the jumble of brake and shifter cables that are in front of the handlebars.. but that is for another blog post.
How to remove a stuck lens filter from a lens that has been dropped:
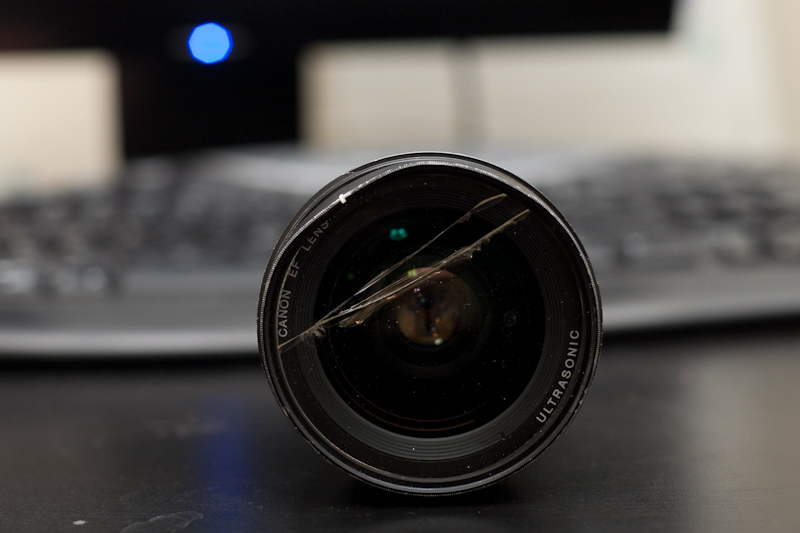

I was a little unhappy as I realized it would mess up my photos for a while, but I was glad to see that the lens itself had not been damaged, even though the filter ring was bent in. I’ve had lenses break before when the camera was dropped (a sadly retired Sigma 20mm f.1.8 and a repaired and still quite useful Canon 10-22mm f/3.5-5.6). The lens here is the Canon 24mm f/1.4 Mark I, but these steps should work for almost any lens.
I was also glad that the camera itself wasn’t damaged, of course.
I ordered new filters from KEH and when they arrived, I did the following. The standard internet “I’m not responsible for anything that goes wrong” disclaimer applies, of course! If you don’t want to do this yourself, there are shops that will do so for you.
Step 1: Try to unscrew the filter
This is an obvious step, but if you can get the filter off the normal way, by all means try to do so. If the threads or filter ring is bent, then it will be really hard (and quite damaging) to unscrew the filter as the threads will no longer be able to move in a helical pattern. It’ll require too much force to turn the filter ring and you will strip the threads of the filter ring or the lens. This will probably make it hard to use a new filter in the future if you do manage to get the broken one off.
Step 2: Remove the filter glass
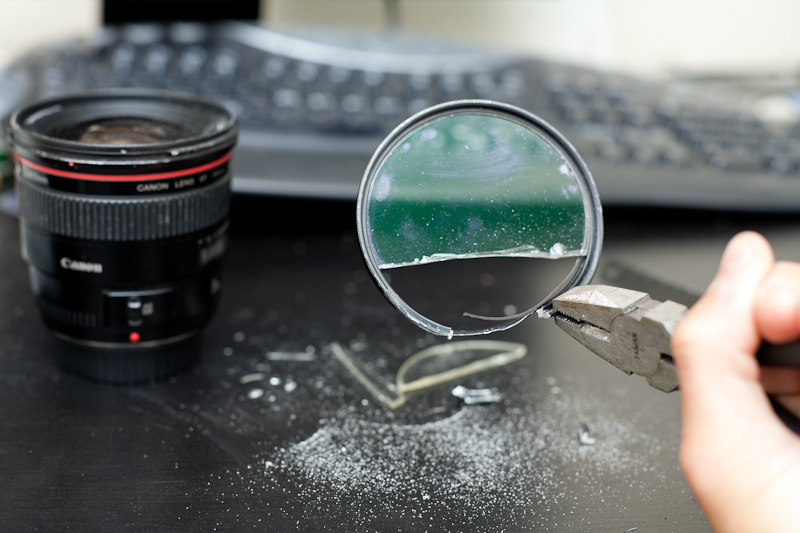
Sometimes when the filter shatters, the glass falls out on its own. In my case, the filter cracked, but not enough for the glass to fall out of the filter ring. This meant I had to find another way to remove it. I chose a hacksaw, but I have used a rotary tool (like a dremel) with a cutoff wheel before with good results.

The filter ring is made of aluminum and is fairly soft and easy to cut. I cut a notch in the filter ring til it was near the lens. The filter is already trashed, so don’t feel bad hacking it to bits. Just be careful not to damage the lens body or the lens elements. I chose to use a hacksaw this time because it’d give me a bit more control.
The notch creates a weak point in the ring, and sometimes you can give the filter a twist with a pair of pliers (generally you want to bend it inward, towards the center of the lens and away from the lens threads. I tried this, but I still had broken glass in the way. If glass has already come out then you can move on to the next step.
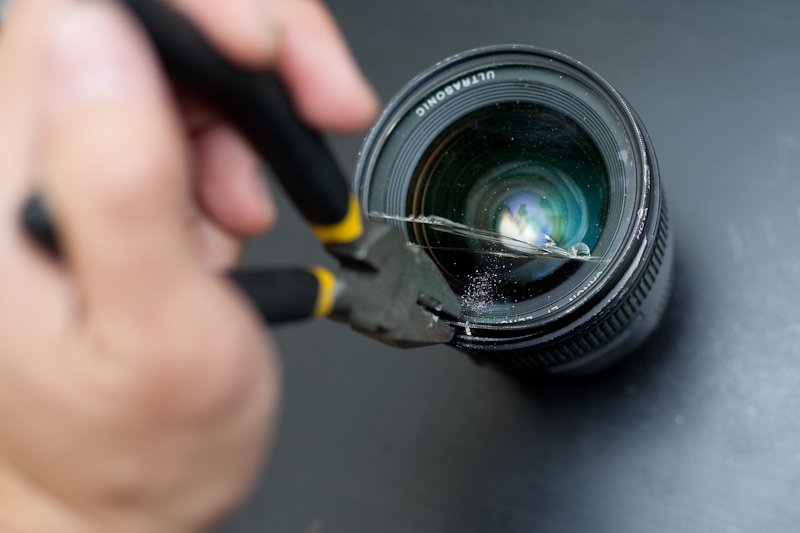
I decided to cut another notch in the filter ring so that I could bend the ring enough to set the shards of glass free.
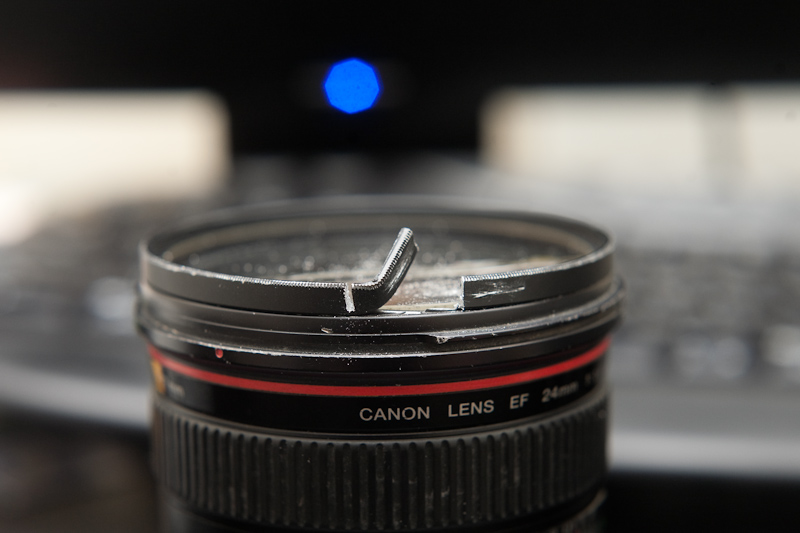
Eventually, I was able to bend the filter ring at an angle so that it no longer captured the glass.
Step 3: Bend filter ring inward
Bending the filter inward releases the bent portion of the filter ring from the lens filter thread.
I removed two chunks of glass and then used a pair of pliers to bend the filter ring inwards. It didn’t take much bending for the filter to come out. I didn’t have to even unscrew it.
Step 4: Clean the lens
There will probably be tons of little aluminum filings and pieces of glass on the face of the lens. I used compressed air to get all of the particles out. Note: Some say not to do this as it can damage the coating on the lens element surface. I don’t think this was a problem for me, but you may want to try using a wet tissue instead.
Step 5: Install the new filter
The new filter went on without a problem, which is a good sign – the lens threads were not damaged. Or at least they weren’t damaged enough for it to be noticeably hard to twist on a new filter. The previous filter protected my lens the last 4 or 5 years. I hope this one lasts even longer.