Bread and Sourdough Troubleshooting Part 2

Sad, weak sourdough ball

Here is a compilation of things I think I've learned about baking bread, sorted by category:

Starter

Starter doesn't rise or double in height

The problem:

Your starter doesn't rise.  Generally this is caused by having a yeast and bacteria population that is too low.

Potential causes:

  • You haven't given it enough time: If your starter is fairly new, it may take a number of days and regular feedings to make your starter healthy.
  • Your starter is overripe: Eventually the byproducts of yeast and bacterial metabolic activity will create alcohols and acids that will start to kill off the yeast and bacteria that you are trying to cultivate.  If your starter smells very sour, this may be the case.
  • Other bad stuff is growing in there: With feedings at the right interval, you will cultivate a yeast and bacteria population that will prevent mold and other undesirable stuff from growing.  If the balance is off and your yeast and bacteria population is depleted, other organisms can have the opportunity to grow.  You can usually tell by smell.

How to fix it:

  • Make sure your starter is active and doubling (or more ) between feedings.  If your starter rises and then falls between feedings, you may need to feed your starter more regularly or determine actions that you can take to slow its activity, like reducing its temperature or changing your feeding ratio.

Related links:

  • None yet

Sourdough starter smells bad

The problem:

Your sourdough starter smells bad.  There are a lot of smell descriptors that are used to describe a good starter.  Sometimes it smells nutty, fruity, sweet, sour, or even a little alcoholic.  But it shouldn't smell like mold or body odor.  Moldy starter smells awful.

Potential causes:

  • The population of your yeast and bacteria isn't strong enough to prevent other organisms, like mold from growing.
  • The walls of the starter container are not clean.  Yeast and bacteria die off along the walls of your container, and then mold and other bad things grow.

How to fix it:

  • Some advise starting over with a new starter.
  • You may be able to "rescue" your starter.  If there's mold growing in it, it may not be growing on more than just the surface.   Some of the good yeasts and bacteria may be living in the bottom of your starter container.  You can remove some of that, move it to a new jar, and then feed it and see how things go after a few feedings.
  • Change starter containers once in a while.

Related links:

  • None yet

Bulk Fermentation

Over-fermentation

The problem:

The weather was recently very warm, and I let a sourdough bulk fermentation go on for too long.  I'd estimate that it got about 10 hours at 80F.  The dough had doubled in volume, but it appears the acids and enzymes eventually destroy the gluten and leave you with a sticky, lumpy mess.  Apparently, when the gluten breaks down, water is released, which makes the dough stickier.  It was a pain to handle, and didn't hold its shape at all during pre-shaping, as this time lapse shows: (5 minutes of time is condensed into a few seconds)


Sad, weak sourdough ball


There's no strength in the dough at all, it's lumpy and shaggy, very wet, and falls apart almost immediately.  This is different than overproofing, as the dough was falling apart before making it to the proofing stage.

How to fix it:

  • If it's too hot, try using cold water in your mix to slow down fermentation
  • Find a cooler place for the bulk fermentation
  • Ferment for a shorter amount of time
  • Use less leaven/levain or starter

Related links:

Baking

Loaf too flat, too dense, or no oven spring

The problem:

No large airy holes, very dense and flat loaf.  Possibly decent flavor, but dense and gummy on the inside.

This might have many potential causes which are generally related to a lack of strength in the loaf and a lack of bubbles and CO2 :

  • Weak yeast or sourdough starter
  • Shaping technique did not generate enough tension in the loaf
  • If there's very little yeast activity at all, you'll notice poor color development in the crust and a "raw" flavor

How to fix it:

  • Make sure your starter is active and doubling (or more ) between feedings
  • Pre-shape and shape your dough to generate adequate tension and gluten deveopment

Related links:

  • None yet

Loaf explodes, blows out, or tears open

The problem:

Hot steam and carbon dioxide have nowhere to go during the bake, and eventually cause your loaf to blowout or explode.

How to fix it:

  • Score the top of your loaf with a lame.  This will help guide the loaf when expanding and hopefully provide you with more oven spring.

Related links:

  • None yet

Bagels version 0.3

Wow, a lot has changed since my last try at making bagels.  My version 0.2 post was more than a year ago!  (Also see the sad version 0.1)

What’s different this time around?

– I used a sourdough starter instead of conventional active-dry yeast.

– I now use a Kitchenaid stand mixer instead of kneading by hand.  Much easier, especially with a dry dough like bagel dough.  (Shout out to Angry Man Eats for making the stand mixer happen.  The blender and mixer still live together.)

– I did the recipe by weight and used a 55% hydration ratio.

– I left the bagels to proof for 24 hours in the fridge.  The 24 hours was mostly out of convenience – I couldn’t bake until then.  I don’t think I had them proof at all last time.

– I had poppy seeds and caraway seeds this time around


How’d they turn out?

– The crust was a bit crispier than last time.  I’m not sure the cause.. will have to do some research.  Baking Bread 101 says it’s because there wasn’t enough steam in the oven, but I did bake over a pan of water.  Then again, maybe it was crispy because I ate the bagel 5 minutes after I took it out of the oven.  The bagels were much less crispy and quite a bit chewier the next day.

– Also, the crust in the center of the bagel tore.  I am not sure what caused this either, other than the crust couldn’t expand as fast as the oven spring wanted it to.  Perhaps I could bake at a lower temperature to stop the crust from forming so soon.  Or maybe I boiled for too long?  Sobachatina’s answer on Stack Exchange has some good tips.  I can’t really slash the bagels though.

– The bagels were much smoother than last time.  I think this was due to the fact that I actually proofed them and probably did a better job kneading. . or at least the mixer did a better job.

– They tasted great and the torn (and crispy) crust doesn’t really bother me.

Recipe

For anyone who is interested (and since I typed this up for Sean anyways), here is what I did:

– Refreshed starter for 2 cycles – I hadn’t baked in 3-4 weeks, I think, so it needed some love.  S
– Mixed ingredients, kneaded in kitchenaid stand mixer:
[table “” not found /]

– I set the dough out to rise overnight (about 8h) at room temperature (about 65F).  In the morning, the dough hadn’t risen much – it spread out a bunch though and increased in volume by  maybe 75%.   I figured that this might happen since I used such a large quantity of starter.
– Formed dough into balls
– Proofed in fridge, covered, for about 12 hours
– Put holes in the balls, stretched them to get the bagel shape
– Boiled each bagel in a pan with ~1 inch of water and 1 tablespoon of brown sugar for 1 minute on each side
– Added toppings
– Baked at 450F for 25 minutes, uncovered, with a pan of water underneath the bagel pan

Bagels v0.2 – A hydration experiment with good results

I made some tweaks after my last attempt at homemade bagels didn’t turn out as well as I had liked.  I figured that there wasn’t the right proportion of water in the last batch.  The dough was too dry, which made it nearly impossible to work with, leading to lumpy bagels.  I also had probably baked them for a little too long.  This time, I set out to try the same King Arthur recipe again with a few changes:

-I split the dough into two batches, with two different hydration ratios

-I boiled the bagels instead of trying to steam them

-I baked for less time


I didn’t adjust the starter recipe, but it looks less dry this time.  The difference is probably due to the fact that I still measured flour by volume rather than weight.  It may also have been a bit warmer.


I decided to aim for a target hydration ratios (amount of water/amount of flour) of 40% (left) and 60% (right).  I think I did some math wrong and ended up with ratios of 38% and 51%.  I didn’t know at the time that I think most hydration ratios cited in other sources are by weight.  By weight, the dough had ratios of 56% (right in bagel territory) and 76% (higher than ciabatta territory!).

The dough on the left started a little scraggly but came together pretty quickly.  The dough on the right was sticky and stayed that way.


Here’s a shot of the doughs partially kneaded.  The dough on the left was stiff but workable.  The dough on the right was still sticky.  I could not knead it by hand.


It looked more capable of making bagels.


Here’s a photo of the doughs after a 90 minute rise.  The dough on the right looks like oobleck.


I had to add a lot of flour to even be able to work the wet dough.


I tried shaping the dough into bagel balls, but it just wasn’t possible.  They did look very capable of a pizza dough, though!


The drier dough (now on the right hand side) was much easier to shape.


I had to add a ton of flour to have these guys not stick to my hands or the counter.


Boiling went okay.  I used regular sugar instead of brown sugar or malt powder, which wasn’t that great of a move.  The goopy and floppy wet bagels ended up absorbing a lot of the sugar and had too sweet of a taste to them in the end.  They kind of reminded me of dumplings.  The drier bagels still had some wrinkles but were a  lot smoother than the last batch I made.


Once again, I coated them all in garlic and sea salt.


Bagels, baked.  The “wet” ones really reminded me of pizza.


Here’s the batch from the drier dough.  I thought they looked pretty great!  They felt good too – the last batch had a bit of a hollow, hardened feel to them.  These felt softer and.. bagely.  The crust was still a bit hard but not too hard.  Note that the garlic is slightly burnt – which is fine with me.  I think I started with frozen garlic chunks to slow their baking/burning process down a bit so that they weren’t completely charred at the end.


eh..


Here’s a good bagel, cut open.  Just a little bit fluffy and chewy.


I burned the bottom a bit, and they stuck a bit.  I should have applied cornmeal more liberally.


I didn’t bother taking pictures of the “wet dough” bagels, but they tasted okay – like a super chewy pizza crust.  One or two of them were a little too doughy inside maybe because they took on too much additional water in the boiling process.  I wasn’t too unhappy though – I ended using the higher hydration recipe for pizza dough.  More to come in Part 3!


Homemade bagels, version 0.1 (not pretty)

There’s a shortage of good bagels in the San Francisco Bay area.   There are some places around like Spot and New York bagel (both carried at Berkeley Bowl.  The other bagels at Berkeley bowl feel like soft dinner rolls with holes in the middle.) and House of Bagels that serve decent one, but I decided to see if I could tackle the issue myself by baking some on my own.  I was also inspired by a talk by Noah Alper, founder of Noah’s Bagels (which no longer use his recipe and he is no longer a part of).  This post (and future ones?) will document my bagel-baking experiments.

I found a potentially good recipe and accompanying blog post  from the King Arthur Flour folks and went to work.

(Spoiler: the bagels did not turn out as bagels but they still tasted okay.  Versions 0.2 and 0.3 were much better)

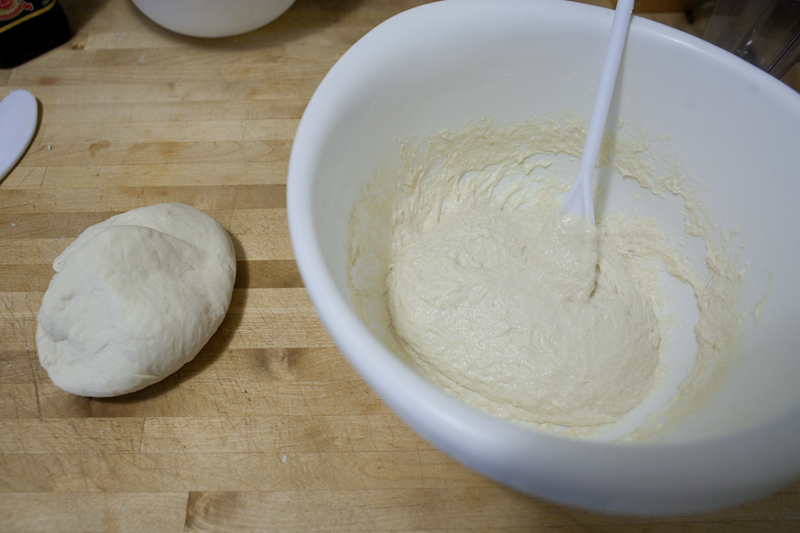
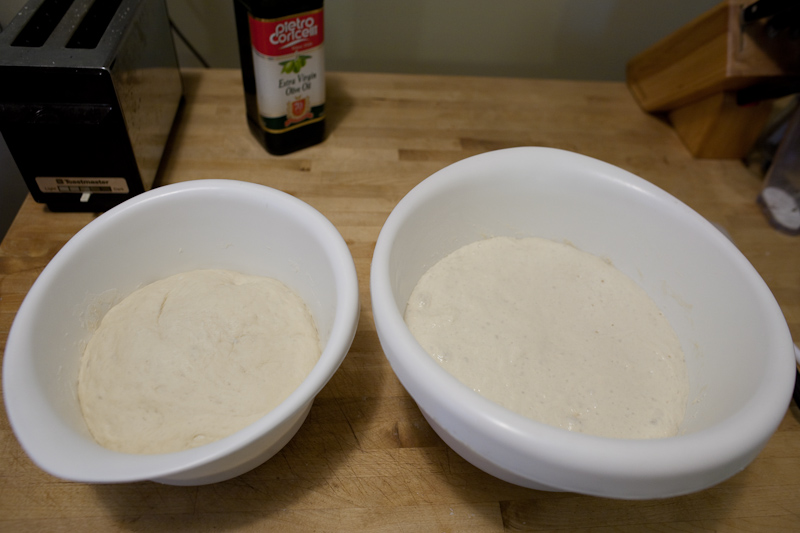
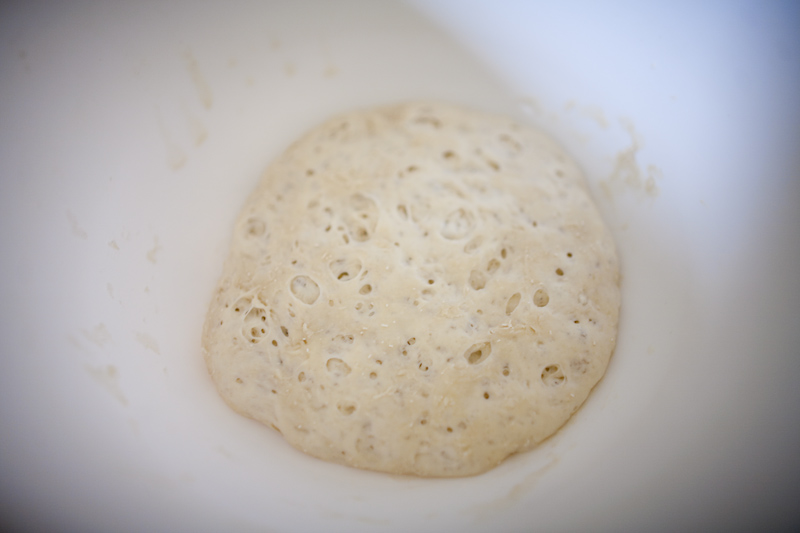
The recipe calls for creating a starter the night before.  Here it is after being given 14 hours to rise.  I didn’t notice this at the time, but my starter was much less watery than what shows up on the King Arthur website.  I don’t know why my starter looked so different – the recipe is really simple.  1 cup flour, 0.5 cups water, and 1/16tsp yeast.  Perhaps my bread flour was packed down too much and I ended up adding too much?

I also  made one change – I couldn’t find their high-protein, hard-wheat flour, so I used their bread flower.  I think it has a slightly lower protein content but I don’t think it made a big difference.


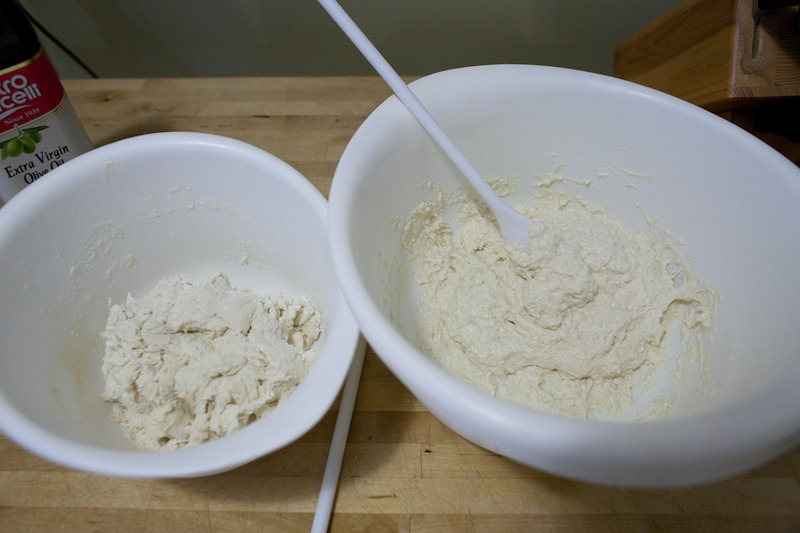
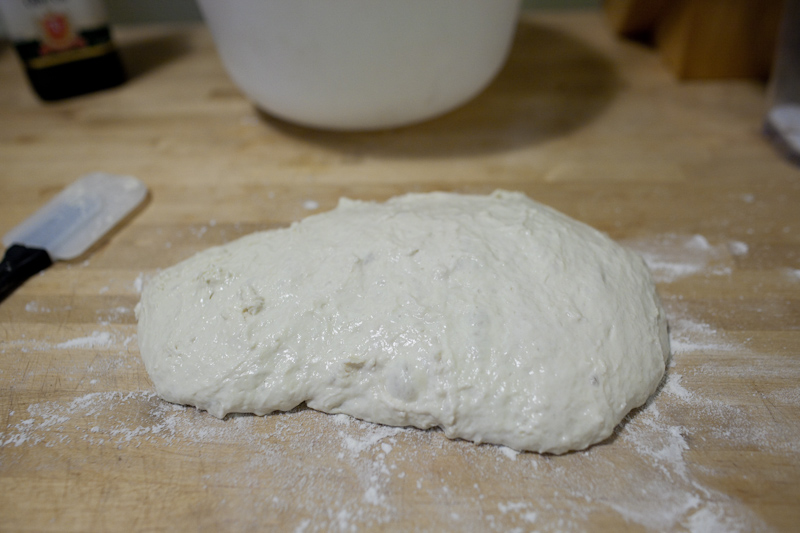
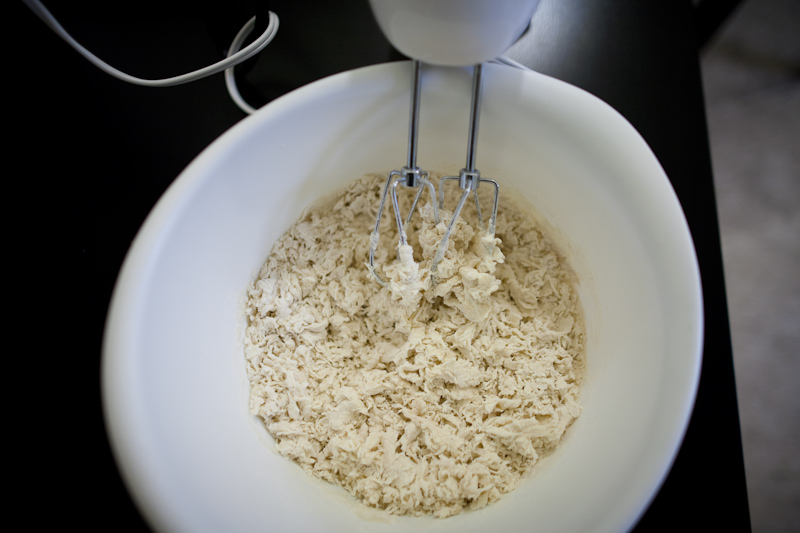
I took the starter and added the remaining dough ingredients – 1 cup of water, 2 tsp salt, 3.5 cups flour and 1.5 tsp yeast.  Once again, the dough was super-dry and hard to keep together.  It looked like spaetzle.


I tried kneading this dough.  It was crazy hard to knead.  I pushed down with all of my body weight to the point where my wrists started hurting and still had trouble making progress.   It was at this point that I decided that we definitely need a stand mixer.


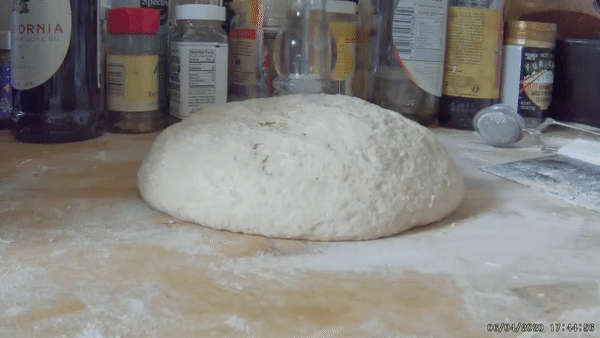
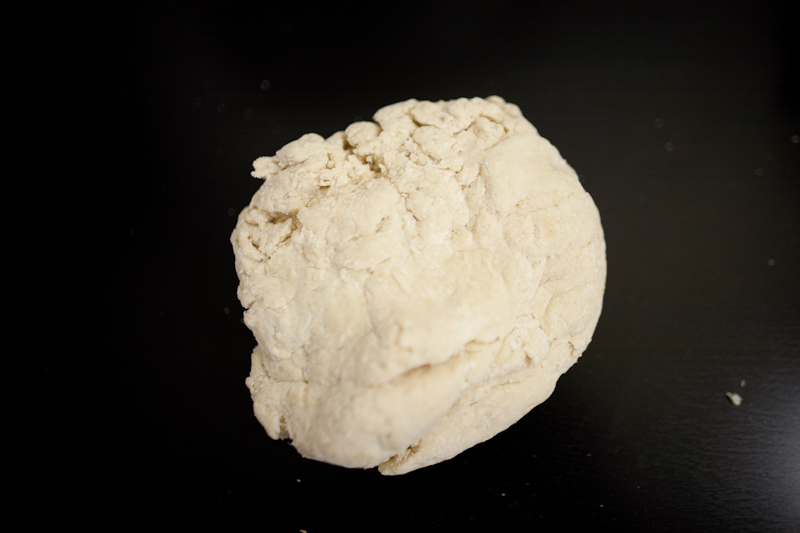
I spent about 20 minutes trying to knead the dough.  Here’s the dough ball.  It still looked much dryer than the pictures on the website.


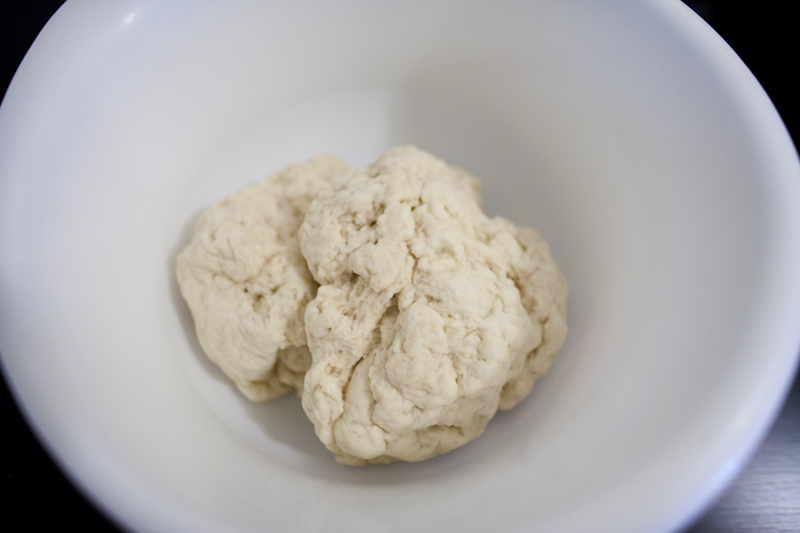
The recipe called for a 90 minute rise.  The dough rose a bit, but not very much.  It doesn’t at all match the photo in the recipe.  The dough was probably too dry for the CO2 produced by the yeast to make it expand.


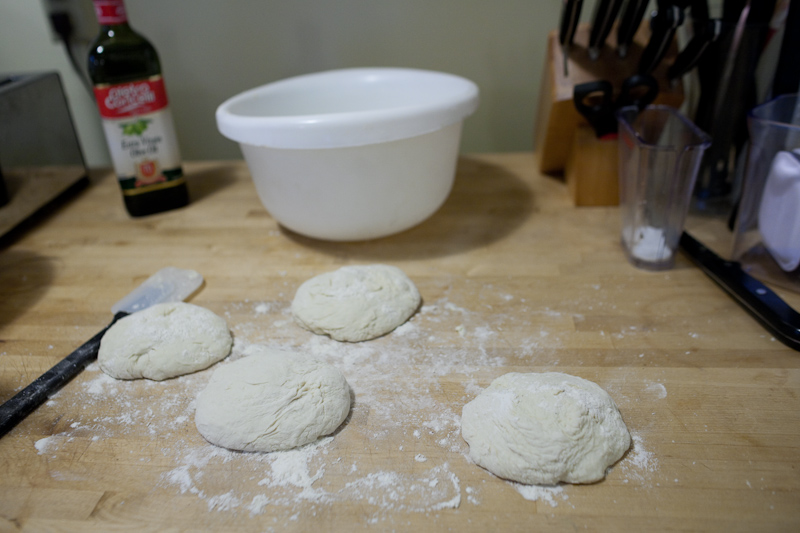
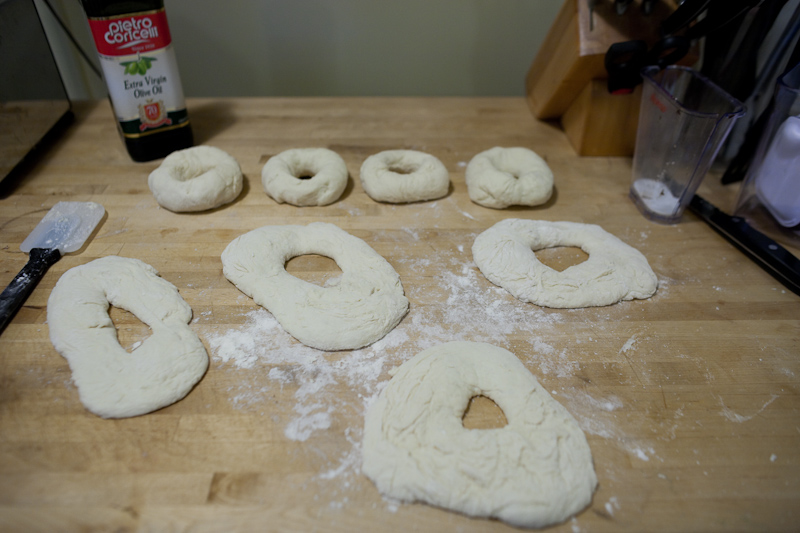
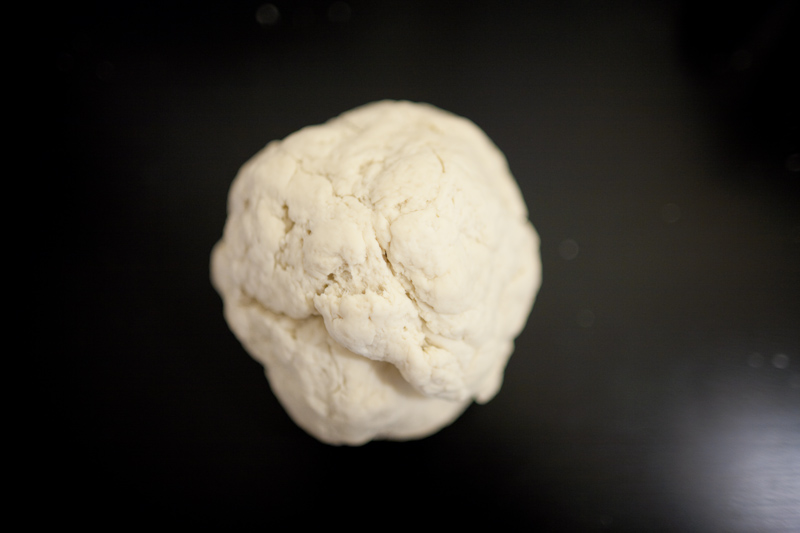
Since the dough was so dry, it was hard to work the bagels and form them into smooth balls.. but I still tried.


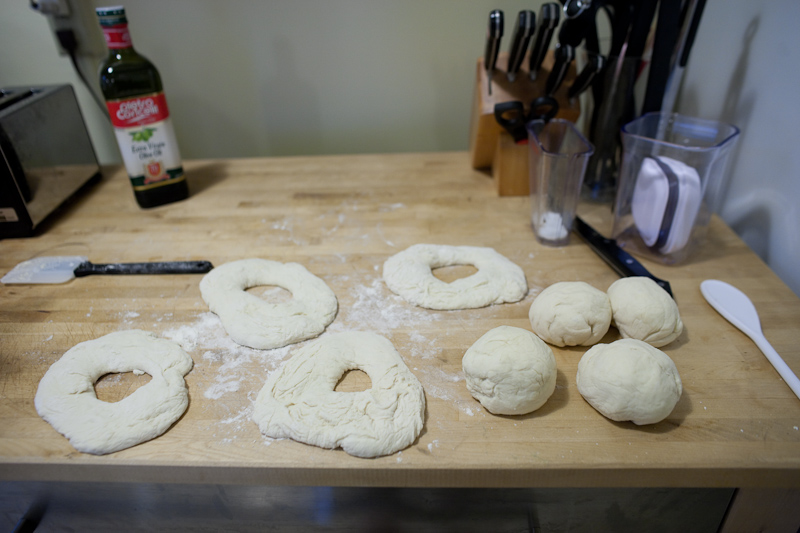
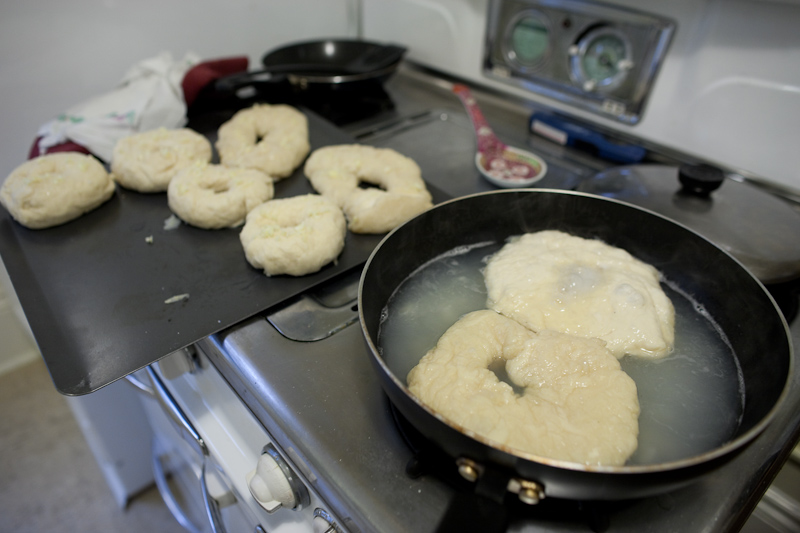
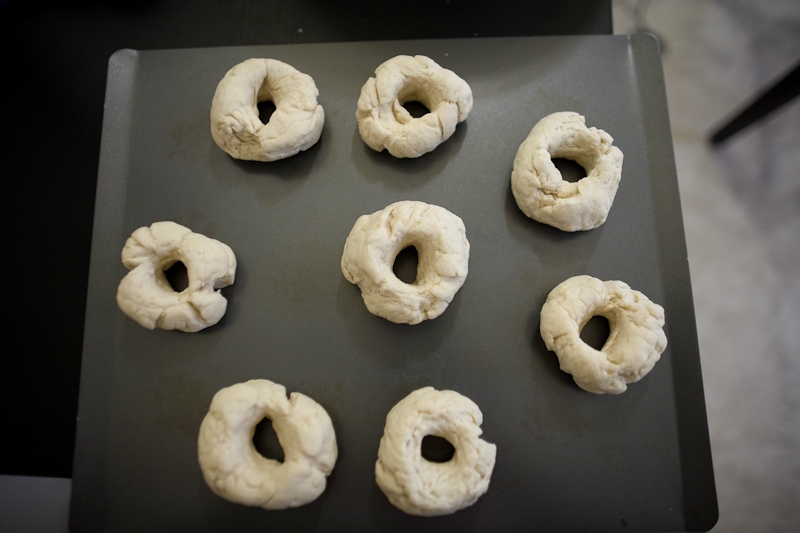
Here are the bagels ready for boiling/steaming.  I decided to try to steam the bagels but didn’t have a good steaming rack.  The recipe calls for using malt powder in the water to give the bagels a bit of a shine.  I didn’t have any, so I used brown sugar.  I tried to experiment with steaming times from 1 minute to 4 minutes but in the end it didn’t matter since the steaming was so ineffective.


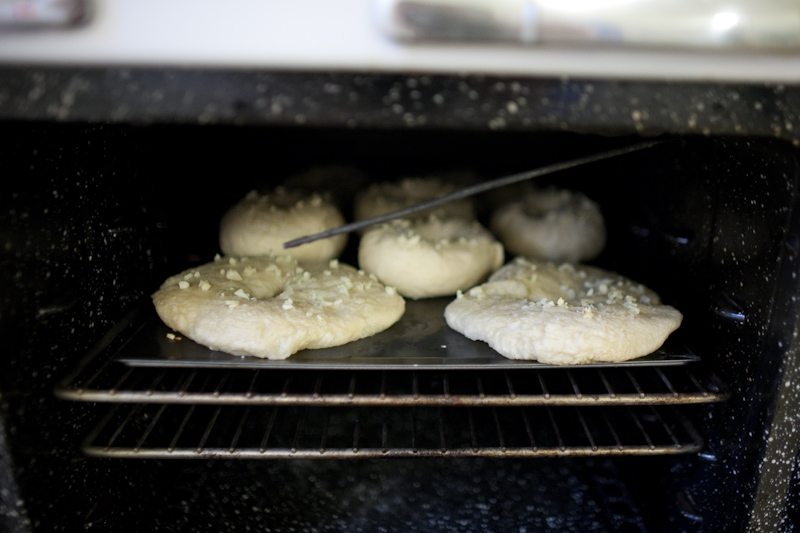
Here are the bagels in the oven.  I topped them with salt and frozen garlic.  I found that it helped to use frozen minced garlic to prevent the garlic from burning too much during baking – the pieces start at a much lower temperature.


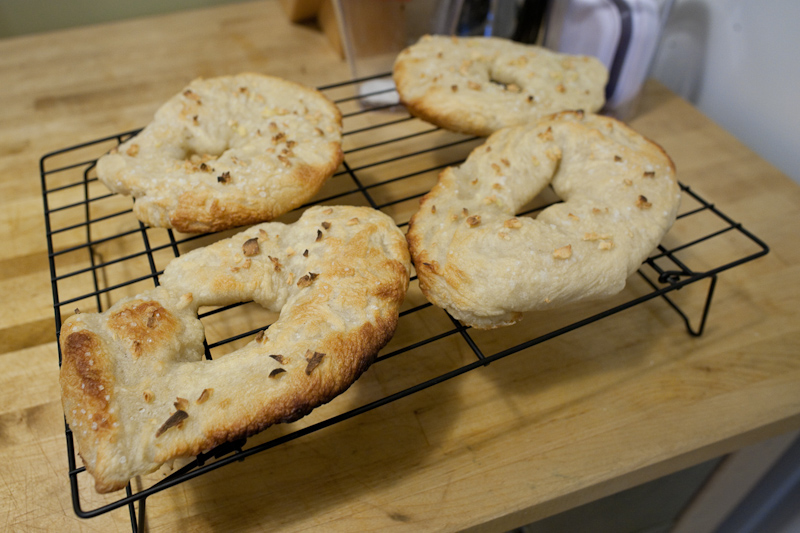
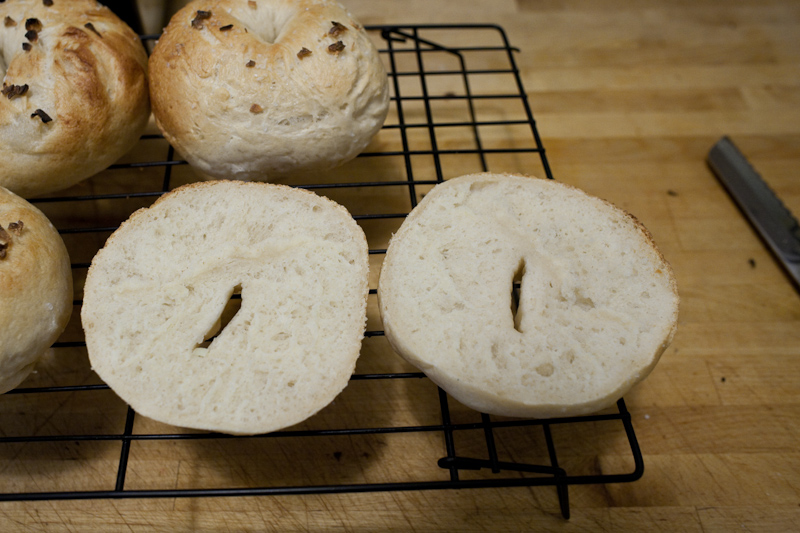
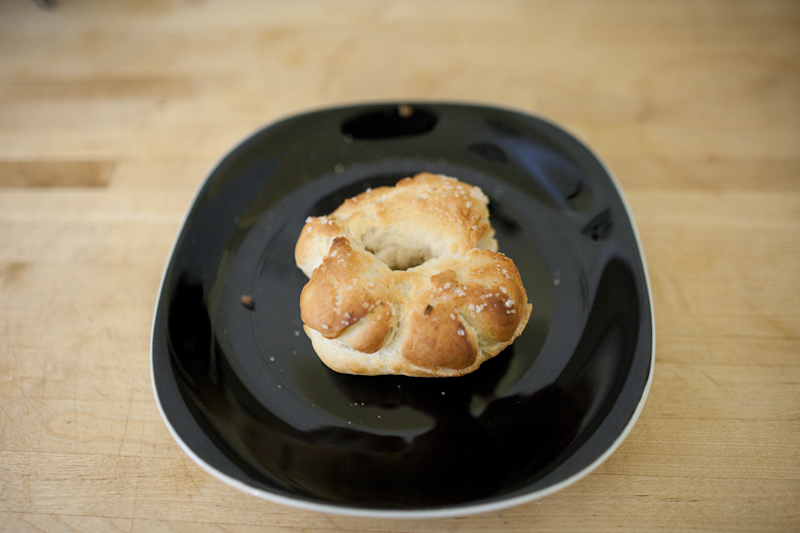
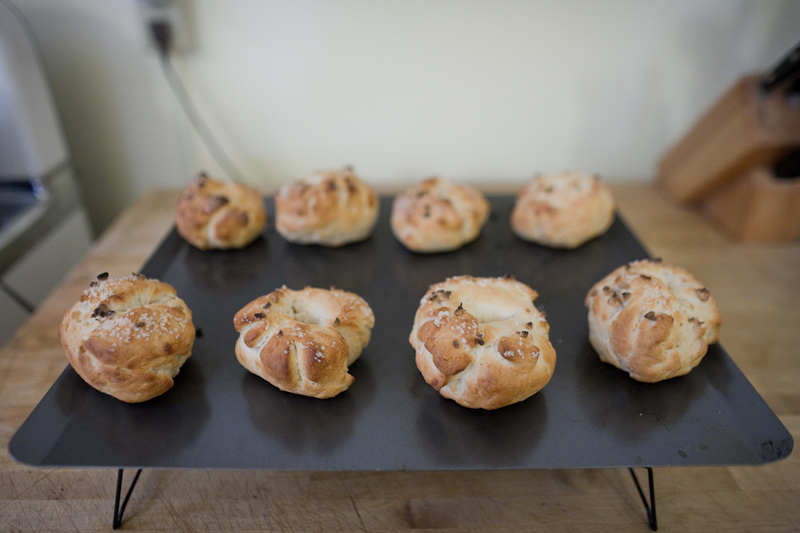
And here are the bagels after baking.  Not very bagely looking.  They also were probably in the oven a bit long.


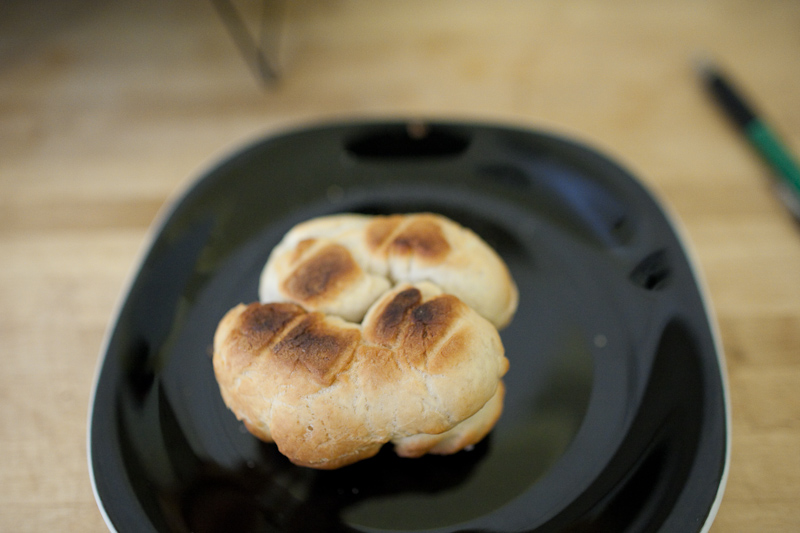
The crust was hard, thick,  and a little crispy.  This didn’t taste bad but it definitely did not taste like a bagel.  The crust resembled something between a hard pretzel and a soft pretzel.  They felt a little light and without the density of a bagel but this may have just been an illusion – since the crust was so damned hard, it made them feel kind of hollow.


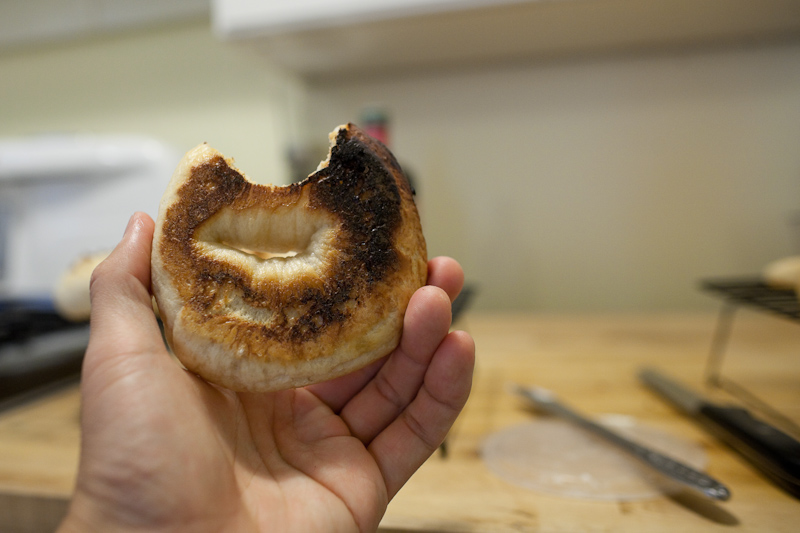
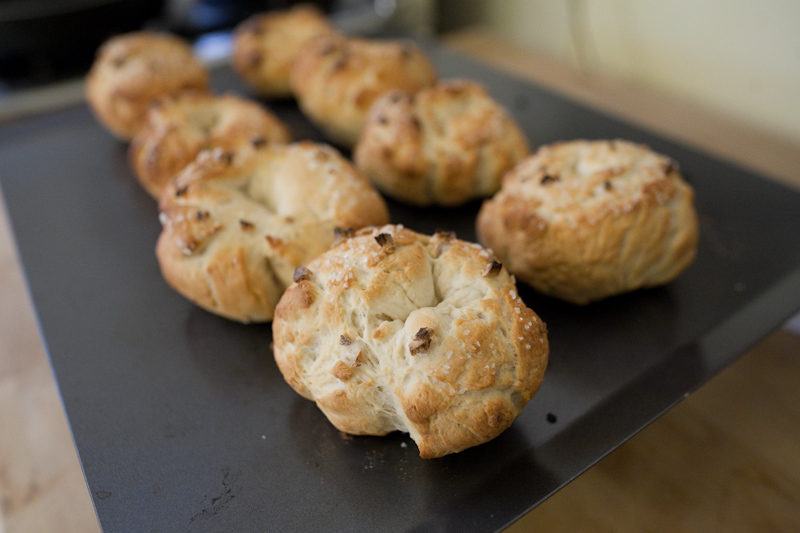
The bottom had burned a little bit.  A bit too much time in the oven.  Though they didn’t stick (too dry?) I decided to use cornmeal the next time just in case.


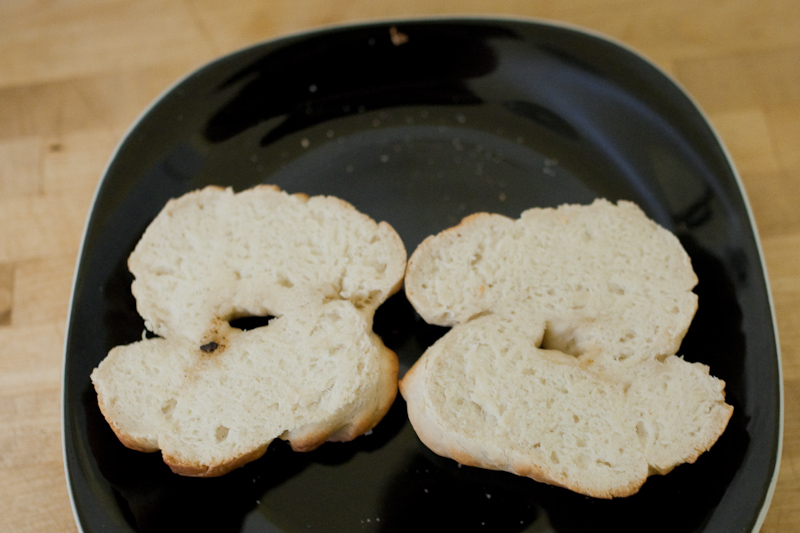
The “crumb” tasted pretty good though.


I started doing a lot of research after this.  I learned about hydration ratios and read up on what happens during all of the breadmaking steps and what each ingredient does.  I learned the reason why a bagel without gluten is a very sad bagel (sorry Mariposa!).  No gluten = no chewiness.  The Encyclopizza has an awesome amount of information related to pizza making and a lot of it carries over to other types of bread.  (Another plus – the author, John Correll is a cyclist as well!)  There was another good link that described the hydration ratios (amount of water/amount of flour in the recipe, aka “percent hydration”) in various types of bread which I lost in a tragic Firefox crash.  But apparently I should have been targeting about 55%-60% (by weight) for the bagels.  The way I made the recipe resulted in a hydration ratio of about 49%.


These bagels still ended up tasting good, but they didn’t taste like bagels.  For version 0.2, I decided to experiment with hydration ratios and had much better results.


Doughsplosion

I tried using dough hooks on a hand mixer with pretty wet dough.  Dough got up into the mixer itself and then, with the help of yeast, expanded into a sticky mess.  I of course opened up the mixer to try to clean it out.